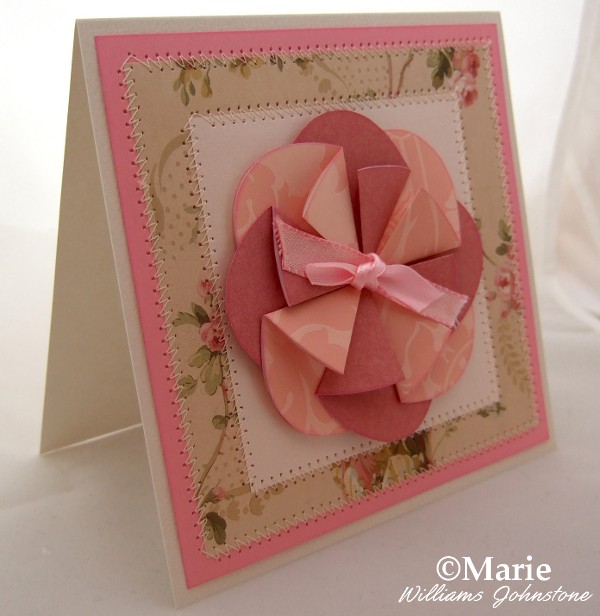

This gorgeous folded spring or summer flower card is so easy to make that even a beginner crafter could make one in no time at all. It makes for a fun project that has very sleek and stylish end results. I use quality scrapbook paper because it creates paper flowers that look professional and beautiful once finished.
Completed floral designs look stunning on the front of a handmade card, on a wrapped gift instead of a bow or as hanging ornaments if you stick two back-to-back and hang with a loop of string.
 |
It takes some very easy folding of just 8 oval shaped paper pieces to create this gorgeous paper rosette. I've been making these floral designs for years because they look great on cards, gifts, home decor and hanging ornaments. With this tutorial, I've also provided a free set of oval templates for you that you can print onto card, cut out and use as templates or print over the top of patterned paper so you can cut out and assemble your design super fast. Get folding now!
Image Credit: Images belong to the Author, Marie Williams Johnstone.
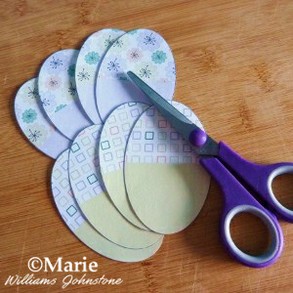 |
There's a free oval template download you can print (shown right after the tutorial instructions) for 8 oval pieces which make up this easy design. You can print these onto some patterned paper, cut out and use right away or print onto card and use as templates that you draw around.
If you don't want to use the free download then just cut out your own oval shapes. Make up an oval template from card and use this to draw around on to the paper of your choice.
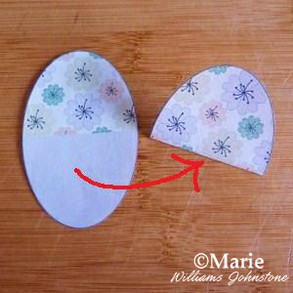 |
Take one of the oval pieces that you have cut out and have the patterned or colored side facing upwards on your work surface.
Fold the oval in half, folding the bottom half under the top. The set of ovals I'm using have been made specifically by me so that it's easy for you to see where you make the first fold along the middle line.
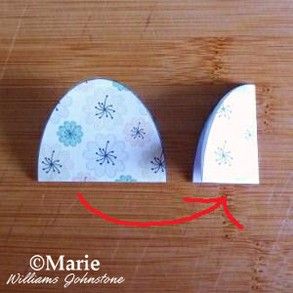 |
With your oval piece, fold it in half again widthways as shown in the image.
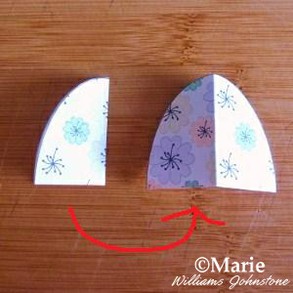 |
Now open out the fold you just made in step 3.
You now have a semi-oval shape except for a crease down the middle.
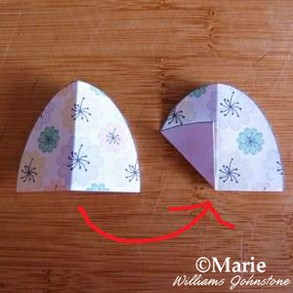 |
Now take hold of the bottom left hand corner and pull it up and towards the middle until it meets the fold line. Fold this triangular flap down.
Now go back and fold every paper piece in the same way by following steps from 2-5.
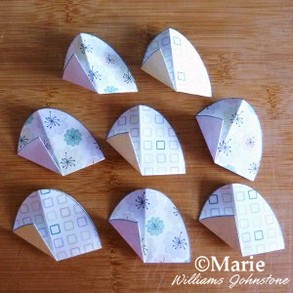 |
You should now have 8 folded pieces of paper. They are very quick to fold when you know how to do it and also fun!
If you print out 2 copies of the free set I've provided, you can then choose to make a rosette up from all the same printed pieces OR to have the patterns alternating instead.
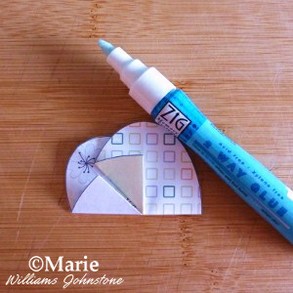 |
Now you need to glue your folded paper pieces together with a small amount of glue on the bottom right of each piece. You can use a glue stick, pva glue (although that can be messy) or a glue pen. I really love my Zig adhesive pens which are easy and fast to use.
Place one folded paper piece up against another so that the folded parts on the left meet as shown. Each piece of paper will line up neatly against the next.
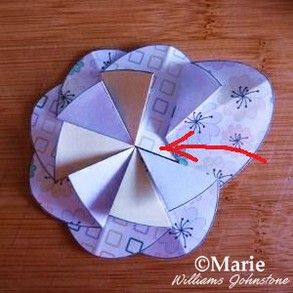 |
Work around the flower, gluing each piece in place. Once you get to the last piece but one, you may have to start slotting the pieces in - a bit like a paper jigsaw puzzle.
With the final piece, you'll need to stick it under the first so all of your design is firmly glued together.
When the flower is complete, I normally like to add something in the middle - a knotted piece of ribbon, a little fabric bow, a button or punched embellishment.
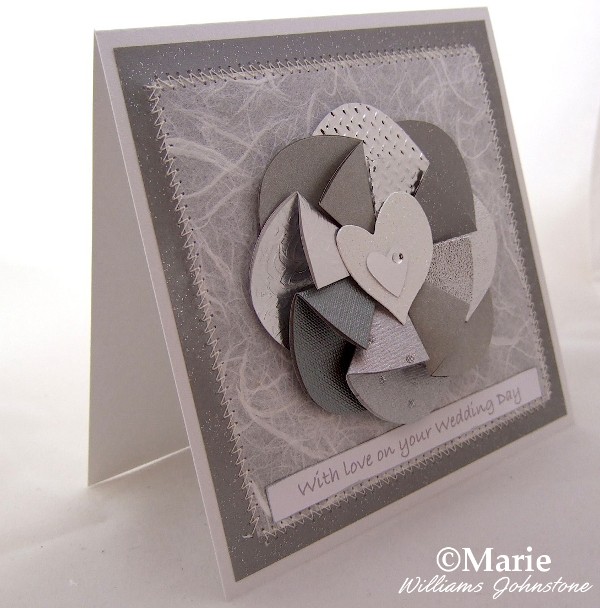 |
Folded paper flowers look great on wrapped gifts instead of a bow, you can use them as pretty decorations in the center of handmade cards as shown or stick two pieces back to back and tie string through for a unique hanging ornament or decoration.
The silver themed wedding card to the left is one of my favorite cards which incorporates machine stitching to adorn the fragile mulberry paper and a sweet silver color heart in the middle. I hope you've enjoyed reading my wizzles page today, thanks for your visit. You can leave me a comment below if you'd like.